How to Build a Ground-Level Deck
A complete walkthrough for building a pressure-treated ground-level deck — from planning and permits through framing, decking, and finishing. Covers material compatibility, fastener requirements for ACQ lumber, and IRC code references.
Project gallery
Plan Your Deck & Pull Permits
A permit is not optional for most decks — it legally protects the finished structure, keeps your homeowner's insurance valid, and proves to future buyers that the work was done to code. Most jurisdictions require one for any deck over 200 sq ft or any deck attached to the house. The application requires a site plan, a materials list, and often a structural sketch. Budget 1–3 weeks for approval and $75–$250 in fees. Before you design anything, call your building department and ask three things: what is the local frost depth, what footing diameter is required, and what ledger attachment method is approved. These answers directly control which products you buy. Also check HOA rules in writing and call 811 at least 3 business days before digging to mark buried utilities — this is free and legally required in every US state.
🔧Tools neededshow
- •Tape measure (100-ft recommended for site plan sketch)
- •Graph paper or free online deck planner (Home Depot Deck Designer, SketchUp Free)
- •Calculator
Most jurisdictions require three inspections: footing (before concrete), framing (before decking), and final. Inspectors are often booked 2–5 days out — schedule each one the morning you finish the previous stage, not the day before you need them.
Mark the Layout with Batter Boards
Batter boards are temporary reference frames set 2 ft outside the deck corners, letting you re-establish string lines after digging without losing your layout. The 30 extra minutes you spend here prevents the much harder problem of discovering a footing is off-centre after concrete has cured. Hold string lines at your planned deck height and use the 3-4-5 triangle method to confirm square: mark 3 ft along one string and 4 ft along the perpendicular — the diagonal between those marks must be exactly 5 ft. Verify by measuring both diagonals of the full frame; they must be equal within ¼ in. Drop a plumb bob from each string intersection to mark exact footing centres on the ground with spray paint.
📦Materials for this stepshow
- •2×4 scrap lumber for batter board stakes and ledgers (cut from offcuts; ~12 pieces)
- •Mason's line / string line — 100 ft
- •Fluorescent marking spray paint (orange or pink)
🔧Tools neededshow
- •Tape measure (25-ft minimum)
- •Framing hammer
- •Speed square or framing square
- •Line level or laser level
- •Plumb bob
Set batter boards OUTSIDE the deck perimeter, not at the corners. If you place them at the corners, you will knock them over the moment you start digging. They must be at least 2 ft outside the footprint to survive the excavation.
Dig & Pour Post Footings
Footings must extend below the local frost line — the depth at which soil freezes in winter. Soil that freezes and thaws will heave anything resting on it. For a 12×16 ground-level deck you need 8 footings at 4-ft centres. Call for the building inspection before you pour anything — inspectors verify depth, diameter, and gravel base in open holes. Pour 6 in of pea gravel into the bottom of every hole before adding concrete. This drainage base prevents hydrostatic pressure from heaving the footing and stops the post end from sitting in standing water. Set tube forms 2–3 in above finished grade to keep surface water out. While concrete is wet, re-stretch your string lines over each footing and drop a plumb bob to confirm J-bolt alignment before the concrete stiffens.
📦Materials for this stepshow
- •Quikrete Concrete Mix 80 lb — 2 bags per footing × 8 footings = 16 bags
- •Tube Form 10-in × 48-in — 1 per footing
- •Post Anchor J-Bolt Kit with nut & washer — 1 per footing
- •Pea gravel 0.5 cu ft — 1 bag per footing
🔧Tools neededshow
- •Clamshell post-hole digger OR rental 1-man power auger (~$80/day; saves 4–6 hours for 8+ holes)
- •Wheelbarrow + mixing hoe
- •5-gallon buckets (water transport)
- •4-ft level
- •Tamping rod or scrap 2×4 (remove air pockets while concrete is wet)
- •Rubber gloves + safety glasses + rubber boots (wet concrete is caustic)
Do not set J-bolts by eye. A bolt that is ½ in off-centre means every post, beam, and joist above it is also offset — and there is no fixing this after the concrete sets. Spend 3 minutes per footing confirming bolt position against your plumb bob before walking away.
Set Posts & Attach the Ledger Board
Posts and the ledger together carry 100% of the deck load. Set each post in its ZMAX standoff base — ACQ treatment is corrosive to bare metal, and the post end will wick moisture and rot if it contacts concrete directly. Brace every post with two 2×4 kickers at 90° to each other, check plumb in both directions, then nail off all base hardware. Fill every nail hole in the base with 10d HDG nails. The ledger requires equally careful attention. Remove house siding entirely from the ledger zone — never install a ledger over siding or foam sheathing. Apply Vycor Plus self-adhering membrane to the band joist, then attach the ledger with LedgerLOK structural screws in two staggered rows at 16-in o.c. Install Z-flashing over the ledger top and tuck the upper flange under the siding above. Seal every fastener penetration and flashing overlap with exterior silicone.
📦Materials for this stepshow
- •4×4×8 UC4A (Ground Contact) PT post — 1 per footing (UC4A required; posts sit within 6 in of grade)
- •ABA44Z ZMAX standoff post base — 1 per footing
- •AC4Z ZMAX post cap — 1 per post (post-to-beam connection in Step 5)
- •10d × 1-1/2-in hot-dip galvanized nails — fill all post base nail holes
- •2×12×12 UC4A ledger board × 1
- •LedgerLOK 1/4-in × 4-in structural ledger screws — 50-pack
- •Vycor Plus self-adhering ledger flashing tape 4-in × 50-ft — 1 roll
- •Z-flashing aluminum drip edge 10-ft — 4 pieces
- •GE Silicone II exterior sealant — 2 tubes
🔧Tools neededshow
- •Post level (4-sided magnetic; frees both hands for bracing)
- •Drill / impact driver
- •Socket wrench set
- •Circular saw (rough-cut posts to height)
- •Pry bar (remove siding in ledger zone)
- •Utility knife (score self-adhering membrane)
- •Tin snips (cut Z-flashing)
- •Caulking gun
- •Helper — ledger installation is a two-person job
Ledger-over-siding is the most common deck construction defect. Water gets behind the siding, into the ledger connection, and rots the band joist from the inside — invisible until the deck starts pulling away from the house. IRC R507.9 requires the ledger to attach to solid wood framing. Remove the siding. It is the only correct method.
Install Rim & Header Joists
The rim joists frame the deck perimeter and set the final shape. Before cutting, crown-check every board by sighting down its length — find the high side of the bow and mark it with an arrow. Install all rim joists crown-side up, making the deck surface slightly convex so water sheds off. A crown-down installation creates a bowl that holds standing water. Clamp each rim joist to the posts, verify it is level along its length, then fasten with 3-in structural screws at 12-in o.c. in two rows. Install corner connections with at least four screws per corner in a staggered pattern. After all four rim joists are fastened, measure both diagonals — they must be equal within ¼ in. Adjust by racking the frame diagonally until the measurements equalise, then apply butyl joist tape to the top edge of all rim joists.
📦Materials for this stepshow
- •2×8×16 UC4A (Ground Contact) rim joist × 4 (UC4A: bottom is within 6 in of grade)
- •Spax HCR-X 3-in structural screws — 1 box
- •Black butyl joist tape 1-5/8-in × 50-ft — 1 roll (top edge of every rim joist)
🔧Tools neededshow
- •Circular saw
- •Drill / impact driver
- •Bar clamps or pipe clamps (hold rim joist while fastening)
- •4-ft level
- •Speed square
- •Chalk line
- •Tape measure
Check both diagonals of the frame before hanging a single joist. A frame that is ¼ in out of square produces deck boards that drift visibly off-parallel with the house by the time you reach the far end. At this stage it takes 30 seconds to fix. After the joists are hung, it takes hours.
Hang Interior Joists
Interior joists carry the deck boards and transfer all load to the beams, posts, and ledger. Snap chalk lines on the ledger and opposite rim joist at 16-in o.c. intervals — mark an X on the waste side of each line so all joists land on the same side of their marks. Position every hanger so its top edge is flush with the ledger top; a hanger set ¼ in low creates a bump in the finished deck surface. Measure the actual bay width for each joist individually — bays vary by ⅛–¼ in even on a perfectly framed deck. Cut each joist to its measured length. Drop it into the ledger hanger, swing the free end to the rim mark, and nail the rim-side hanger with the joist in place. Install a hurricane tie at every joist-to-rim junction, then apply butyl joist tape across the full top surface of each joist before moving on.
📦Materials for this stepshow
- •2×8×12 UC4A (Ground Contact) interior joist × 13 (16-in o.c. for 12-ft-wide deck)
- •Simpson LUS28Z ZMAX single 2×8 joist hanger — 26 (2 per joist)
- •10d × 1-1/2-in hot-dip galvanized joist hanger nails — 5-lb box
- •H2.5AZ ZMAX hurricane tie — 26 (one per joist at each rim junction)
- •Black butyl joist tape 1-5/8-in × 50-ft — 3 rolls (top surface of all joists)
🔧Tools neededshow
- •Tape measure
- •Chalk line + chalk
- •Pencil or lumber crayon
- •Circular saw
- •Drill / impact driver
- •Framing nailer + 10d HDG ring-shank nails (renting saves 3–4 hours vs hand-nailing 26 hangers)
- •Speed square
- •Torpedo level
Joist hanger nails are NOT interchangeable with common framing nails. They must be 10d × 1-½-in hot-dip galvanized — short enough to fit the hanger holes without blowing through the far side, and HDG-coated to resist ACQ corrosion. Simpson LUS28Z specifies this exact nail. Buy a dedicated box and keep it separate. Inspectors fail framing for empty hanger holes and wrong nail types.
Lay the Deck Boards
Deck boards are the most visible part of the build. Before fastening anything, dry-lay 4–5 boards to calculate spanning: figure out how many boards cover the deck at 1/8-in spacing and whether the last board needs to be ripped. A ripped board is fine — but plan for it now, not at the end. Start from the ledger and work outward. Insert a 16d nail as a 1/8-in spacer between every board before driving screws. Drive two GRK Deck Elite screws per joist crossing, 1 in from each board edge — the Zip-Tip point self-pilots, no pre-drilling needed except within 2 in of board ends. Every 10 boards, snap a chalk line across the board ends to confirm the run stays parallel to the house; correct drift gradually over the next few boards. When all boards are laid, snap a chalk line 1 in past the outer rim face and cut the overhang in one continuous saw pass. Apply end-cut preservative immediately to every cut end.
📦Materials for this stepshow
- •2×6×16 UC3B (Above Ground) PT deck board × 24 + 10% waste buffer — boards are the walking surface and never contact soil; UC3B is correct, not UC4A
- •GRK Deck Elite 2-1/2-in #9 star drive screws × 2 × 400-pack — Climatek coating required for ACQ lumber; do NOT substitute standard zinc screws
- •End-cut wood preservative 1 qt — apply to every cut end within 30 min of sawing
🔧Tools neededshow
- •Circular saw with fresh 40-tooth carbide blade
- •Drill / impact driver + T25 star bit (or dedicated deck screw gun)
- •Chalk line + chalk
- •Speed square
- •16d common nails as 1/8-in spacers — grab a handful
- •Safety glasses + N95 dust mask (PT sawdust contains chemical treatment)
- •Knee pads
Fresh pressure-treated lumber is wet from the treatment process and will shrink roughly ¼ in in width as it dries over 6–12 months. If boards feel heavy and look greenish or dark, install with zero gap — they will open their own gap as they cure. If they feel light and look pale, use the standard 1/8-in spacer. Installing wet PT boards with a spacer will leave gaps wider than intended once cured.
Add Fascia, Railing & Finishing Details
Fascia covers the exposed rim joist faces and transforms raw framing into a finished deck. Cut fascia boards with a fine-tooth blade (80-tooth minimum on composite) and miter outside corners at 45° rather than butting them. Pre-drill every screw location slightly countersunk — composite fascia cracks under a screw head if you skip this. Where two boards meet, align the joint over a joist centre and cut both ends at 45° (scarf joint) so no raw end grain is visible. Railing is required by IRC R312.1 for any deck 30 in or more above grade: minimum 36 in high up to 30 in, 42 in above 30 in, with balusters spaced so a 4-in sphere cannot pass through any opening. Mount posts with ½-in stainless carriage bolts through the rim joist — never screws alone. After the final building inspection passes, wait 6–12 months for PT lumber to dry before applying stain; staining wet PT prevents penetration.
📦Materials for this stepshow
- •Composite fascia board 1×8×12 (Trex Enhance Toasted Sand) × 6 boards
- •Color-matched composite screws 1-5/8-in T20 star drive — 1 box
- •Trex Transcend line post 4×4×6 — 1 per ≤ 6 ft of railing run (if deck > 30 in above grade)
- •Trex Transcend square baluster 32-in 10-pack — (railing linear ft ÷ 4 in) + 10% waste
- •Trex Transcend top rail 8-ft + bottom rail 8-ft — 1 pair per 8 ft of railing
- •Post sleeve & skirt kit — 1 per post
- •½-in stainless carriage bolts × 4 per post
- •GE Silicone II exterior sealant — 1 tube (touch-up)
- •End-cut wood preservative 1 qt (touch-up cuts)
- •Ready Seal exterior stain & sealer 5 gal (apply 6–12 months post-construction)
🔧Tools neededshow
- •Miter saw (preferred for composite fascia; circular saw chips without fine-tooth blade)
- •80-tooth fine-tooth circular saw blade
- •Countersink drill bit
- •Drill / impact driver
- •Caulking gun
- •Random orbital sander + 80-grit pad (knock down PT splinters at hand and shin level)
- •4-in chip brush or pump sprayer (stain application)
Every fastener that contacts pressure-treated lumber in the railing assembly must be stainless steel or hot-dip galvanized — including the bolts at the post base where the sleeve meets the PT rim joist. Standard zinc screws corrode against ACQ treatment within a season and will stain the composite sleeves. Use a stainless or plastic standoff shim under every post base.
Materials Required
| Product | Qty | ![]() | ![]() |
|---|---|---|---|
🪵Deck Boards1 item | $505.92 | ||
![]() 2-in x 6-in x 16-ft Above Ground Pressure-Treated Deck Board (UC3B) | 24boards | $21.08 | View |
📐Framing Lumber3 items | $268.84 | ||
![]() 2-in x 8-in x 12-ft Ground Contact Pressure-Treated Joist (UC4A) ⚠ 2x8x12 UC4A (Ground Contact) — interior joists at 16" o.c.; GC required ≤ 6" from grade | 13boards | $20.68 | View |
🔩 2-in x 8-in x 16-ft Ground Contact Pressure-Treated Joist / Rim (UC4A) ⚠ 2x8x16 UC4A (Ground Contact) — rim joists ×2 + header boards ×2 | 4boards | — | — |
🔩 2-in x 10-in x 12-ft Ground Contact Pressure-Treated Beam (UC4A) ⚠ 2x10x12 UC4A (Ground Contact) — doubled beam; 2 plies per side = 4 boards total | 4boards | — | — |
🏗️Posts1 item | $173.44 | ||
![]() 4-in x 4-in x 8-ft Ground Contact Pressure-Treated Post (UC4A) ⚠ 4x4x8 UC4A (Ground Contact) — trim to height on site; DO NOT use Above Ground rated posts | 8posts | $21.68 | View |
🔗Structural Hardware6 items | |||
🔩 Double 2x8 Joist Hanger ZMAX LUS28-2Z (10-Pack) Simpson Strong-Tie ⚠ Double 2x8 joist hanger ZMAX LUS28-2Z — for doubled beam connections | 1pack | — | — |
🔩 4x4 Post Cap ZMAX AC4Z Simpson Strong-Tie ⚠ 4x4 post cap ZMAX AC4Z — post-to-beam connection at each post | 8each | — | — |
🔩 Hurricane Tie ZMAX H2.5AZ (10-Pack) Simpson Strong-Tie ⚠ Hurricane tie H2.5AZ — 1 per joist end where joist meets beam/rim | 26each | — | — |
🔩 Deck Ledger Connector ZMAX LCE4Z (5-Pack) Simpson Strong-Tie ⚠ Deck ledger connector LCE4Z — for ledger-to-joist attachment if deck is attached | 2pack | — | — |
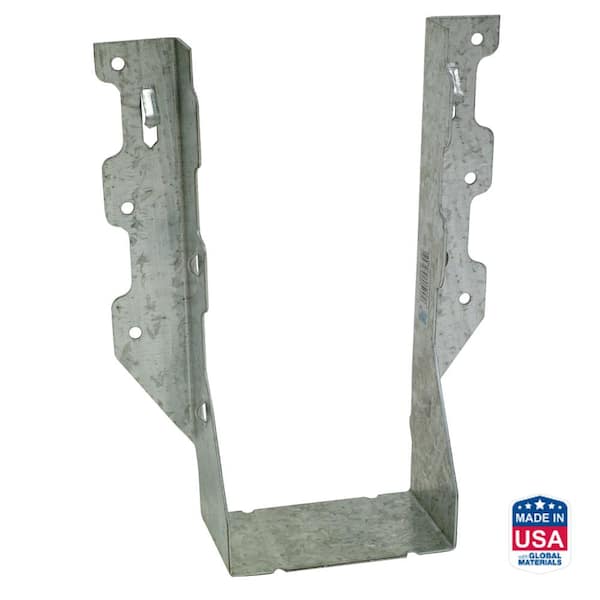
![]() Single 2x8 Joist Hanger ZMAX LUS28Z (10-Pack) Simpson Strong-Tie ⚠ Single 2x8 joist hanger ZMAX LUS28Z — 1 pack (10) per side = 2 packs | 2packs | View | View |
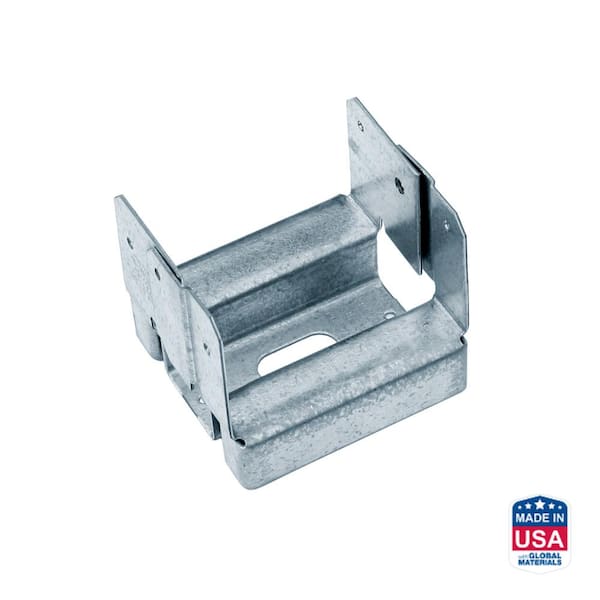
![]() 4-in Standoff Post Base ZMAX ABA44Z Simpson Strong-Tie ⚠ 4" standoff post base ZMAX ABA44Z — 1 per post; never let PT contact concrete | 8each | View | View |
🔩Fasteners6 items | |||
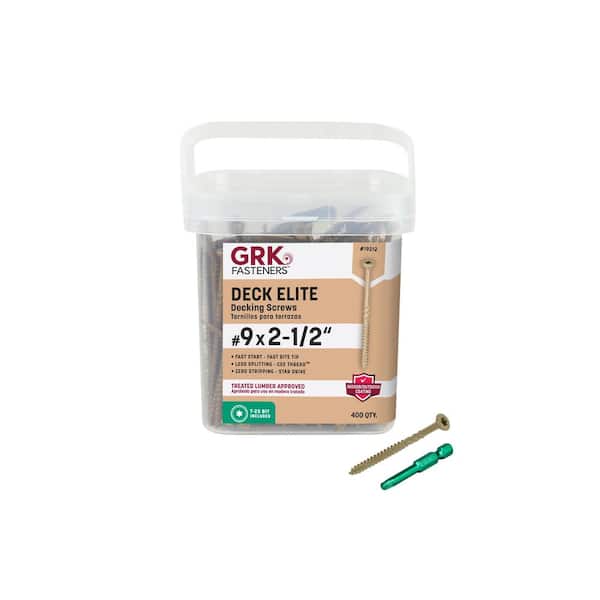
![]() Deck Elite Wood Deck Screw #9 x 2-1/2-in Star Drive Bugle Head (400-Pack) GRK Fasteners ⚠ GRK Deck Elite 2-1/2" — face-screwing deck boards; Zip-Tip + reverse thread prevents mushrooming around screw head | 2boxes | View | View |
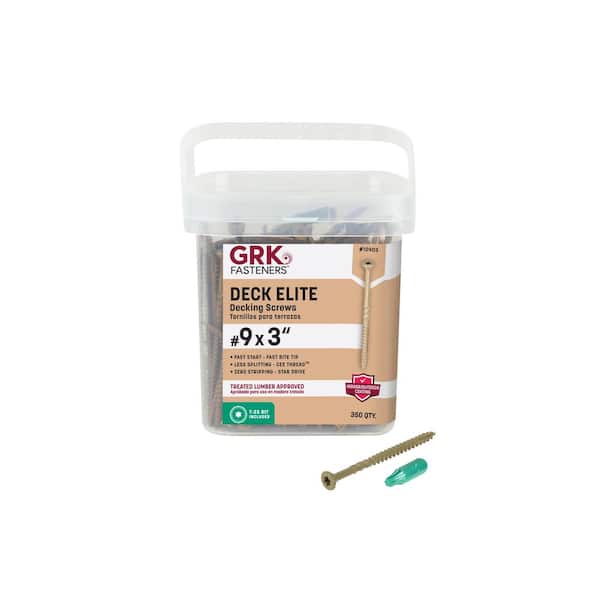
![]() Deck Elite Wood Deck Screw #9 x 3-in Star Drive Bugle Head (350-Pack) GRK Fasteners ⚠ GRK Deck Elite 3" — framing connections, rim joists, blocking; Climatek coating REQUIRED for ACQ/CA-C lumber | 2boxes | View | View |
🔩 HCR-X Structural Screw 3-in (100-Pack) Spax ⚠ Spax HCR-X 3" structural screw — framing connections (not exposed decking) | 2boxes | — | — |
![]() Strong-Drive 10d x 1-1/2 in. SCN Smooth-Shank Connector Nail Hot-Dip Galvanized (5 lb.) Simpson Strong-Tie ⚠ 10d hot-dip galvanized hanger nails — ALL nail holes in hangers must be filled | 2boxes | — | — |
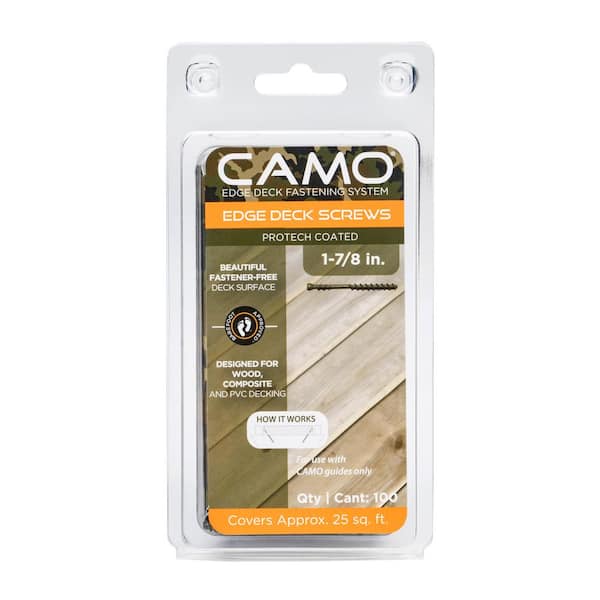
![]() Exterior Hidden Deck Fastener 1-7/8-in (100-Pack) Camo ⚠ CAMO hidden fastener 100-pk — use instead of face-screwing deck boards; 2 packs = 200 fasteners covers 192 sq ft | 2packs | View | View |
🔩 1/2-in x 3-1/2-in SDS Heavy-Duty Connector Screw (50-Pack) Simpson Strong-Tie ⚠ 1/2"x3.5" SDS lag screw 50-pk — ledger board attachment to house band joist | 1pack | — | — |
🪨Footings & Concrete4 items | $111.68 | ||
🔩 Tube Form Concrete Column 10-in x 48-in Quikrete ⚠ Tube form 10"x48" — sets footing diameter and keeps sides clean | 8each | — | — |
🔩 Post Anchor J-Bolt Kit with Nut & Washer (4-Pack) Simpson ABU44 ⚠ J-bolt post anchor kit — set in wet concrete; allows post base attachment | 8each | — | — |
🔩 Pea Gravel 0.5 cu ft Bag ⚠ Pea gravel 0.5 cu ft — 6" drainage base at bottom of each footing hole | 8bags | — | — |
![]() Concrete Mix 80 lb Quikrete ⚠ Quikrete 80 lb — 2 bags per footing x 8 footings | 16bags | $6.98 | View |
🌧️Weatherproofing5 items | |||
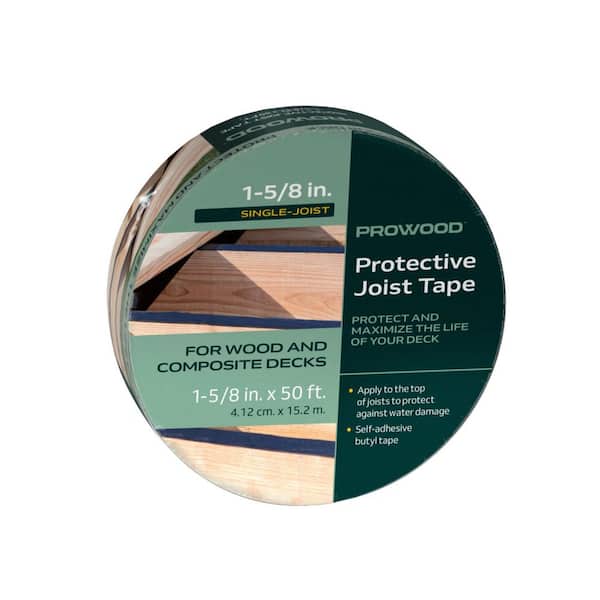
![]() Black Butyl Joist Tape 1-5/8-in x 50-ft ProWood ⚠ ProWood black butyl joist tape 50 ft — apply to top of ALL joists before decking; 4 rolls = 200 ft covers 15 joists × 12 ft = 180 ft + waste | 4rolls | View | View |
🔩 Self-Adhesive Ledger Flashing Tape 4-in x 50-ft Vycor Plus ⚠ Vycor Plus ledger flashing 4"x50ft — flash ledger BEFORE attaching to house | 1roll | — | — |
🔩 Z-Flashing Drip Edge Aluminum 10-ft Amerimax ⚠ Z-flashing drip edge — cap ledger top to direct water away from house | 4pieces | — | — |
🔩 Silicone II Exterior Sealant 10.1 oz Clear GE ⚠ GE Silicone II exterior — seal flashing overlaps and ledger penetrations | 2tubes | — | — |
🔩 Wood Preservative End-Cut Solution 1 qt Copper Green ⚠ End-cut wood preservative — apply to all cut ends of PT lumber within 30 min | 1qt | — | — |
🎨Fascia & Trim1 item | $463.68 | ||
![]() Composite Fascia Board 1-in x 8-in x 12-ft (Toasted Sand) Trex Enhance ⚠ Trex Enhance composite fascia 1x8x12 (Toasted Sand) — covers rim joists; 6 boards x 12 ft covers perimeter with joints; match deck board colour | 6boards | $77.28 | View |
🖌️Finishing1 item | |||
🔩 Exterior Wood Stain & Sealer Natural Cedar 5 gal Ready Seal ⚠ Ready Seal stain & sealer 5 gal — apply after 6 months once PT lumber dries out | 1can | — | — |
| Estimated Total | $1,523.56 | — | |

2-in x 6-in x 16-ft Above Ground Pressure-Treated Deck Board (UC3B)
24 boards

2-in x 8-in x 12-ft Ground Contact Pressure-Treated Joist (UC4A)
13 boards
⚠ 2x8x12 UC4A (Ground Contact) — interior joists at 16" o.c.; GC required ≤ 6" from grade
2-in x 8-in x 16-ft Ground Contact Pressure-Treated Joist / Rim (UC4A)
4 boards
⚠ 2x8x16 UC4A (Ground Contact) — rim joists ×2 + header boards ×2
2-in x 10-in x 12-ft Ground Contact Pressure-Treated Beam (UC4A)
4 boards
⚠ 2x10x12 UC4A (Ground Contact) — doubled beam; 2 plies per side = 4 boards total

4-in x 4-in x 8-ft Ground Contact Pressure-Treated Post (UC4A)
8 posts
⚠ 4x4x8 UC4A (Ground Contact) — trim to height on site; DO NOT use Above Ground rated posts
Double 2x8 Joist Hanger ZMAX LUS28-2Z (10-Pack)
Simpson Strong-Tie
1 pack
⚠ Double 2x8 joist hanger ZMAX LUS28-2Z — for doubled beam connections
4x4 Post Cap ZMAX AC4Z
Simpson Strong-Tie
8 each
⚠ 4x4 post cap ZMAX AC4Z — post-to-beam connection at each post
Hurricane Tie ZMAX H2.5AZ (10-Pack)
Simpson Strong-Tie
26 each
⚠ Hurricane tie H2.5AZ — 1 per joist end where joist meets beam/rim
Deck Ledger Connector ZMAX LCE4Z (5-Pack)
Simpson Strong-Tie
2 pack
⚠ Deck ledger connector LCE4Z — for ledger-to-joist attachment if deck is attached

Single 2x8 Joist Hanger ZMAX LUS28Z (10-Pack)
Simpson Strong-Tie
2 packs
⚠ Single 2x8 joist hanger ZMAX LUS28Z — 1 pack (10) per side = 2 packs

4-in Standoff Post Base ZMAX ABA44Z
Simpson Strong-Tie
8 each
⚠ 4" standoff post base ZMAX ABA44Z — 1 per post; never let PT contact concrete

Deck Elite Wood Deck Screw #9 x 2-1/2-in Star Drive Bugle Head (400-Pack)
GRK Fasteners
2 boxes
⚠ GRK Deck Elite 2-1/2" — face-screwing deck boards; Zip-Tip + reverse thread prevents mushrooming around screw head

Deck Elite Wood Deck Screw #9 x 3-in Star Drive Bugle Head (350-Pack)
GRK Fasteners
2 boxes
⚠ GRK Deck Elite 3" — framing connections, rim joists, blocking; Climatek coating REQUIRED for ACQ/CA-C lumber
HCR-X Structural Screw 3-in (100-Pack)
Spax
2 boxes
⚠ Spax HCR-X 3" structural screw — framing connections (not exposed decking)

Strong-Drive 10d x 1-1/2 in. SCN Smooth-Shank Connector Nail Hot-Dip Galvanized (5 lb.)
Simpson Strong-Tie
2 boxes
⚠ 10d hot-dip galvanized hanger nails — ALL nail holes in hangers must be filled

Exterior Hidden Deck Fastener 1-7/8-in (100-Pack)
Camo
2 packs
⚠ CAMO hidden fastener 100-pk — use instead of face-screwing deck boards; 2 packs = 200 fasteners covers 192 sq ft
1/2-in x 3-1/2-in SDS Heavy-Duty Connector Screw (50-Pack)
Simpson Strong-Tie
1 pack
⚠ 1/2"x3.5" SDS lag screw 50-pk — ledger board attachment to house band joist
Tube Form Concrete Column 10-in x 48-in
Quikrete
8 each
⚠ Tube form 10"x48" — sets footing diameter and keeps sides clean
Post Anchor J-Bolt Kit with Nut & Washer (4-Pack)
Simpson ABU44
8 each
⚠ J-bolt post anchor kit — set in wet concrete; allows post base attachment
Pea Gravel 0.5 cu ft Bag
8 bags
⚠ Pea gravel 0.5 cu ft — 6" drainage base at bottom of each footing hole

Concrete Mix 80 lb
Quikrete
16 bags
⚠ Quikrete 80 lb — 2 bags per footing x 8 footings

Black Butyl Joist Tape 1-5/8-in x 50-ft
ProWood
4 rolls
⚠ ProWood black butyl joist tape 50 ft — apply to top of ALL joists before decking; 4 rolls = 200 ft covers 15 joists × 12 ft = 180 ft + waste
Self-Adhesive Ledger Flashing Tape 4-in x 50-ft
Vycor Plus
1 roll
⚠ Vycor Plus ledger flashing 4"x50ft — flash ledger BEFORE attaching to house
Z-Flashing Drip Edge Aluminum 10-ft
Amerimax
4 pieces
⚠ Z-flashing drip edge — cap ledger top to direct water away from house
Silicone II Exterior Sealant 10.1 oz Clear
GE
2 tubes
⚠ GE Silicone II exterior — seal flashing overlaps and ledger penetrations
Wood Preservative End-Cut Solution 1 qt
Copper Green
1 qt
⚠ End-cut wood preservative — apply to all cut ends of PT lumber within 30 min

Composite Fascia Board 1-in x 8-in x 12-ft (Toasted Sand)
Trex Enhance
6 boards
⚠ Trex Enhance composite fascia 1x8x12 (Toasted Sand) — covers rim joists; 6 boards x 12 ft covers perimeter with joints; match deck board colour
Exterior Wood Stain & Sealer Natural Cedar 5 gal
Ready Seal
1 can
⚠ Ready Seal stain & sealer 5 gal — apply after 6 months once PT lumber dries out
Estimated Total
$1,523.56* Prices are estimates and may vary. Always verify at checkout.
Want to be kept in the loop?
Get notified when we publish new guides and planning tools.
See something off?
Report safety issues or inaccuracies.
Safety & Legal Disclaimer
This guide is for informational purposes only and does not constitute professional engineering, architectural, or contractor advice. Building codes vary by jurisdiction — always verify local requirements, obtain all required permits, and consult a licensed contractor or structural engineer before beginning any construction project. Aribuilds makes no warranty as to the accuracy, completeness, or suitability of this information for any particular project. Use of this guide is at your own risk. Aribuilds accepts no liability for personal injury, property damage, structural failure, or code violations.
Product links on this page may be affiliate links. Full terms, disclaimer & affiliate disclosure →

